1.ขั้นตอนซ่อม แกะตระแกรง+ใบพัดออก
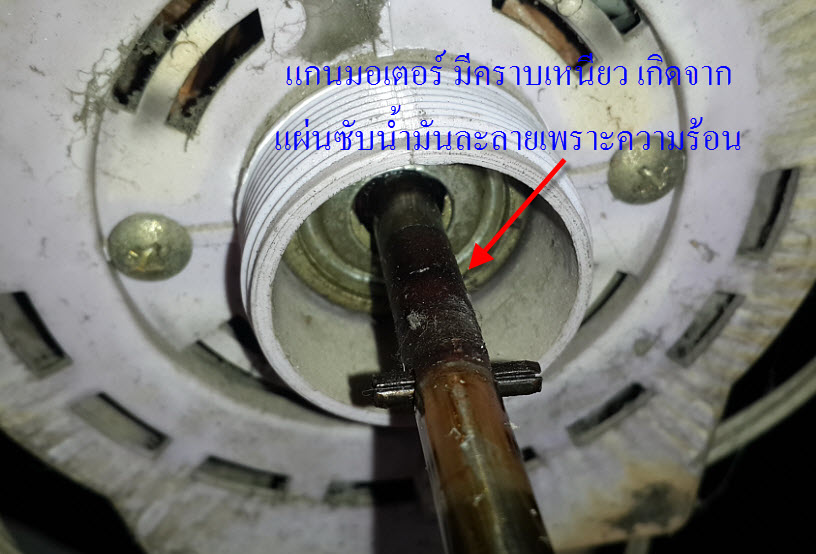
เอามือจับแกนดู ไม่สามารถหมุนได้เลย มีคราบไหม้ของแผ่นซับน้ำมันอยู่ที่แกน
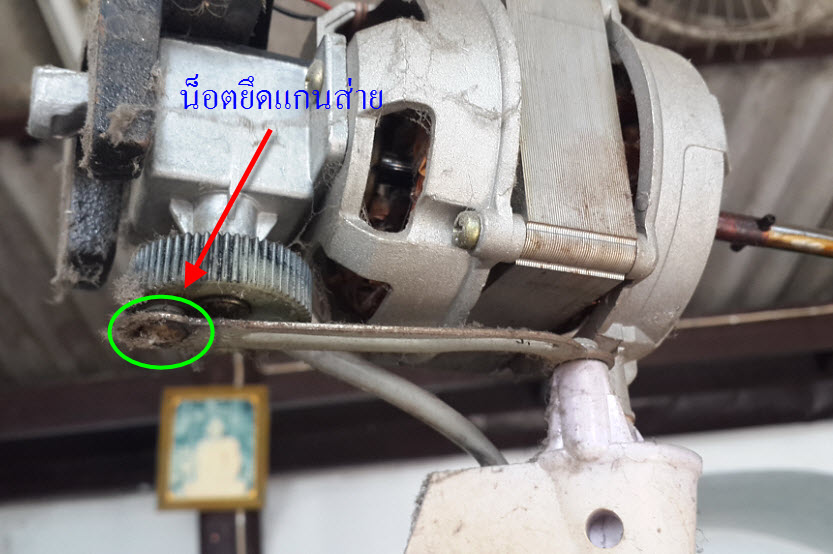
2.ถอดฝาครอบหน้าและหลังออก จะเห็นโครงของมอเตอร์ ขันน็อตยึดเฟืองส่ายออก
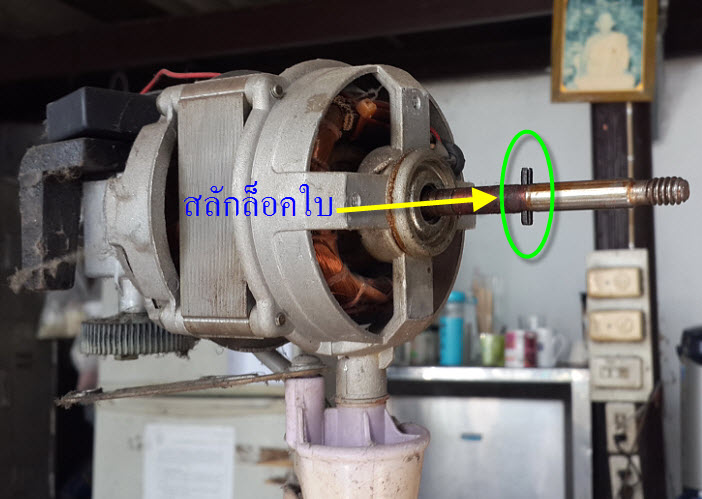
3.ถอดสลักล็อคใบพัดลมออก
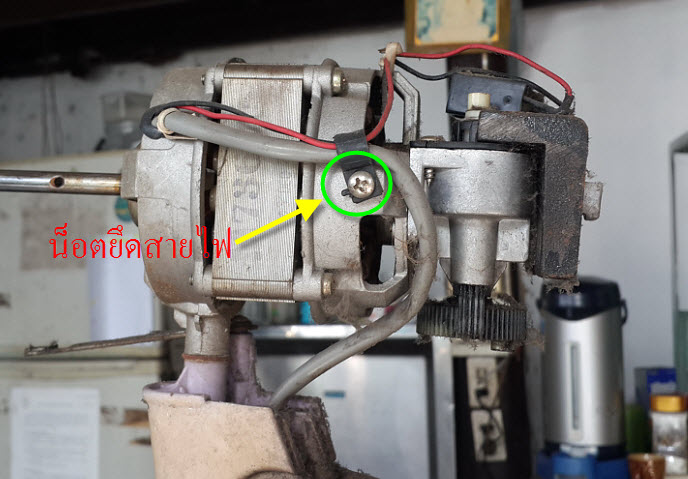
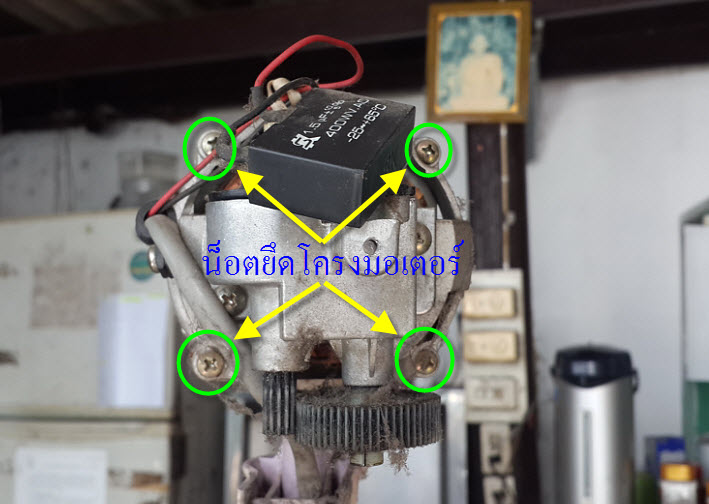
4.ถอดน็อตยึดสายและน็อตยึดคาปาซิเตอร์ออก
5.ขันน็อตยึดโครงมอเตอร์ออก
6.ค่อยๆถอดฝาครอบด้านท้ายออกก่อน

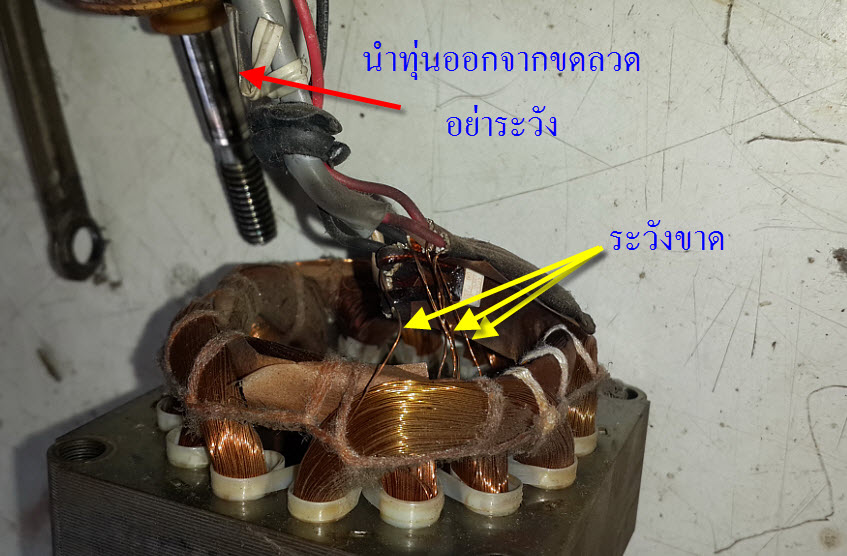
7.ถอดชุดขดลวดพร้อมทุ่นมอเตอร์
ออกจากโครงหน้า อย่างระวัง เพราะว่าสายทองแดงอาจขาดได้

8.ค่อยๆนำทุ่นมอเตอร์ ออกจากขดลวดอย่างระวัง อย่าให้กระทบกระเทือนกับขดลวด
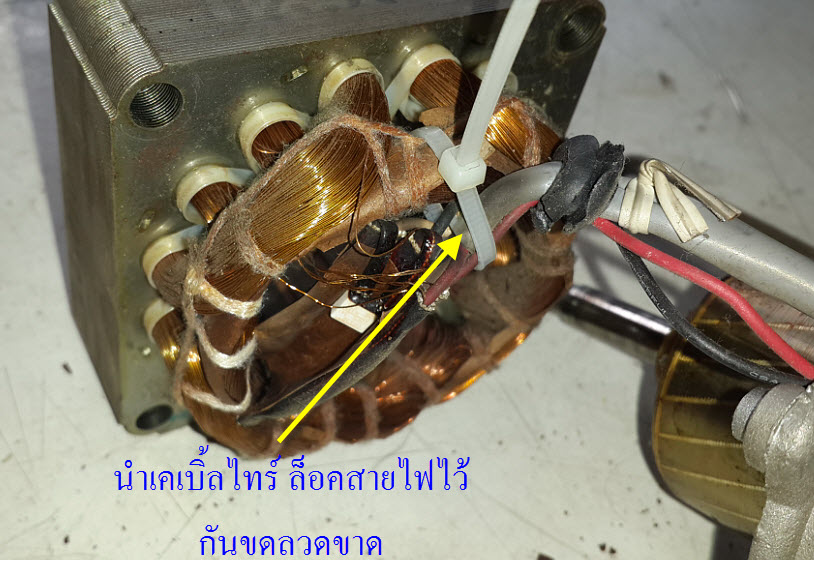
9นำเคเบิ้ลไทร์
มารัดสายไฟให้ติดกับขดลวด เพื่อที่เราจะได้ไม่ต้องระแวงว่าขดลวดจะขาด
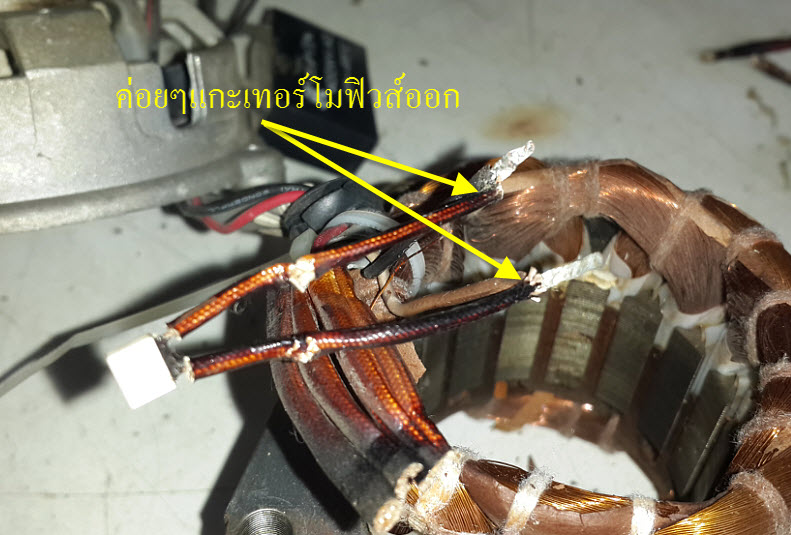
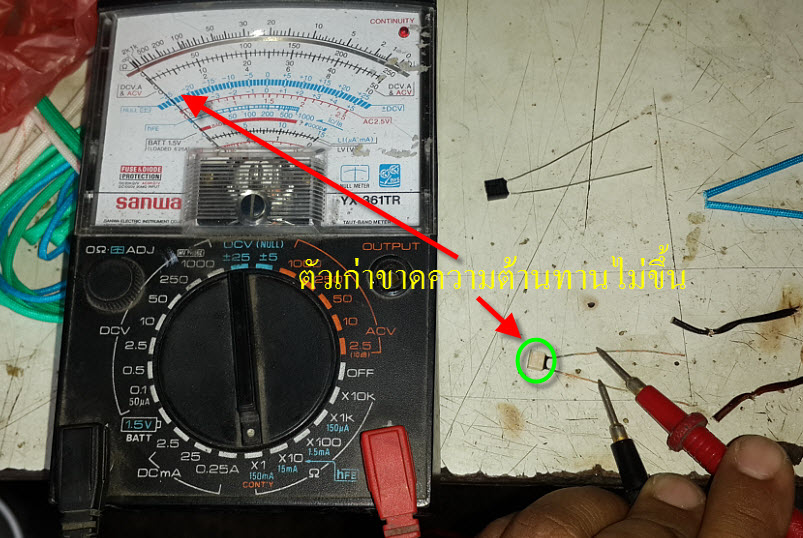
10.ตรวจเช็คเทอร์โมฟิวส์
ค่อยๆแยกสายมันออกมา

11.ค่อยแงะเอาเจ้าเทอร์โมฟิวส์ออกมาวัด
12.วัดความต้านทานแล้วไม่ขึ้น แสดงว่าเทอร์โมฟิวส์ขาด11.ค่อยแงะเอาเจ้าเทอร์โมฟิวส์ออกมาวัด
13.วัดความต้านทานเทอร์โมฟิวส์ใหม่ ใช้ได้ปกติ

14.ทำการเปลี่ยนเทอร์โมฟิวส์ใหม่และเปลี่ยนสายหุ้มขอลวดใหม่

15.ใช้เคเบิ้ลไทร์
รัดจุดจั๊มขดลวดให้สวยงามและให้เทอร์โมฟิวส์แนบกับขดลวด

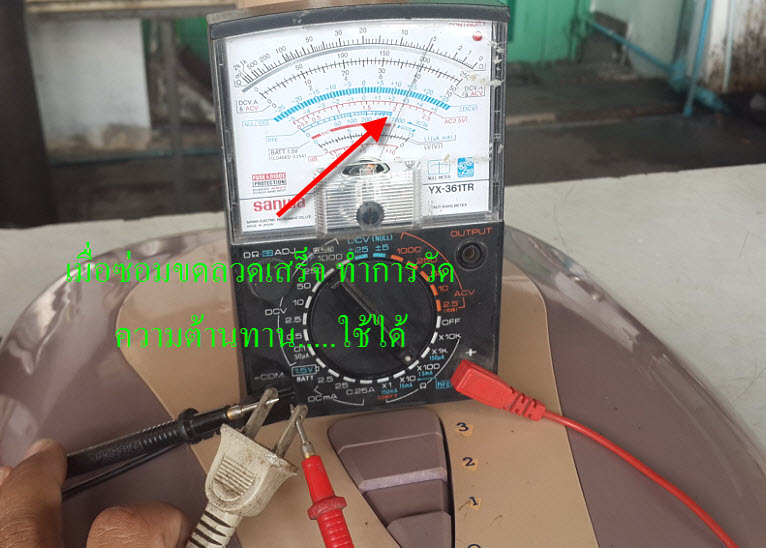
16.เมื่อซ่อมชุดขดลวดเสร็จก็ทำการตรวจเช็คว่าขดลวดใช้ได้ปกติ
เพราะมีความต้านทานขึ้นแล้ว
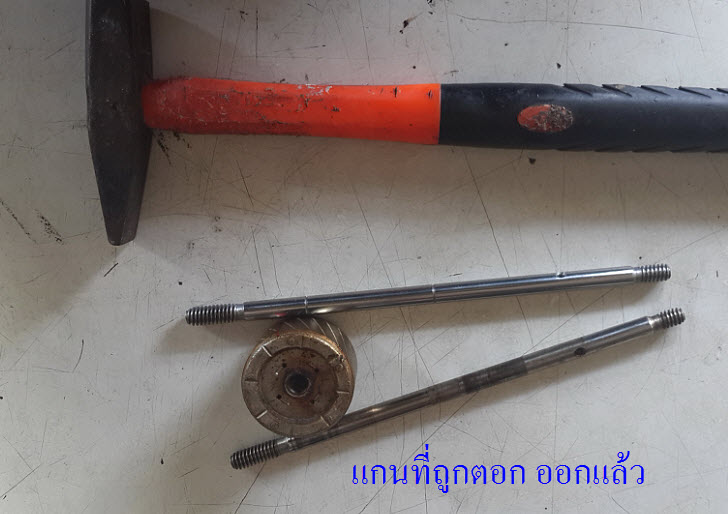
17.ทีนี้เรามาสำรวจแกนพัดลมบ้างว่าเสียหายหรือไม่
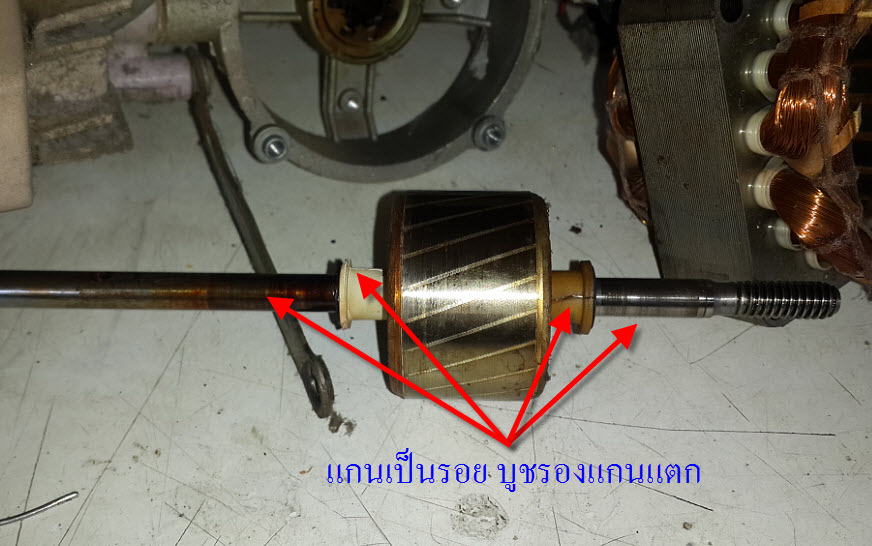
18.จากการมองแล้ว
แกนไม่สามารถใช้งานได้อีกเพราะว่าแกนเป็นรอย ซื้อแกนใหม่มาเปลี่ยน
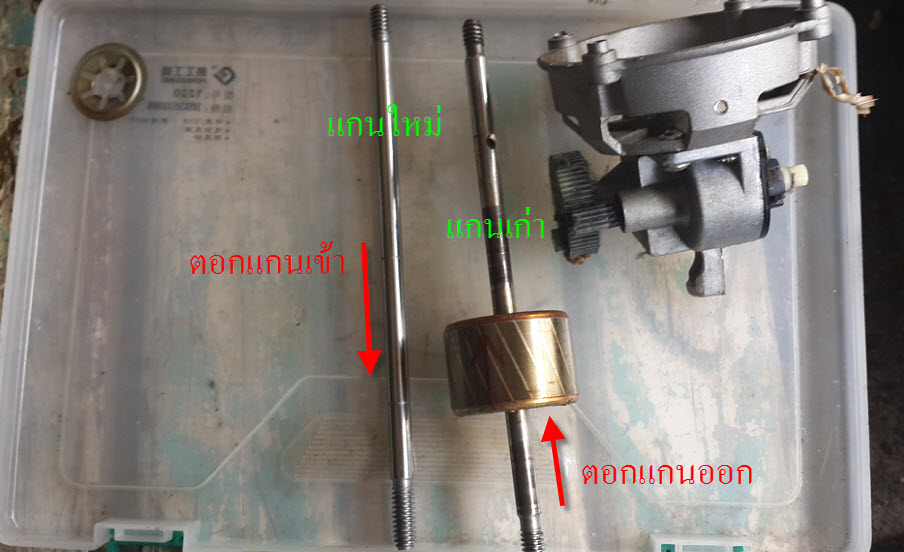
19.ใช้ค้อนตอกแกนออกตามลูกศรข้อ 18. หาร่องไม้เสียบแกนจะได้ตอกง่ายๆ
20.ตอกแกนใหม่เข้าที่เดิม
แล้วก็ใส่แหวนพลาสติกรองแกน
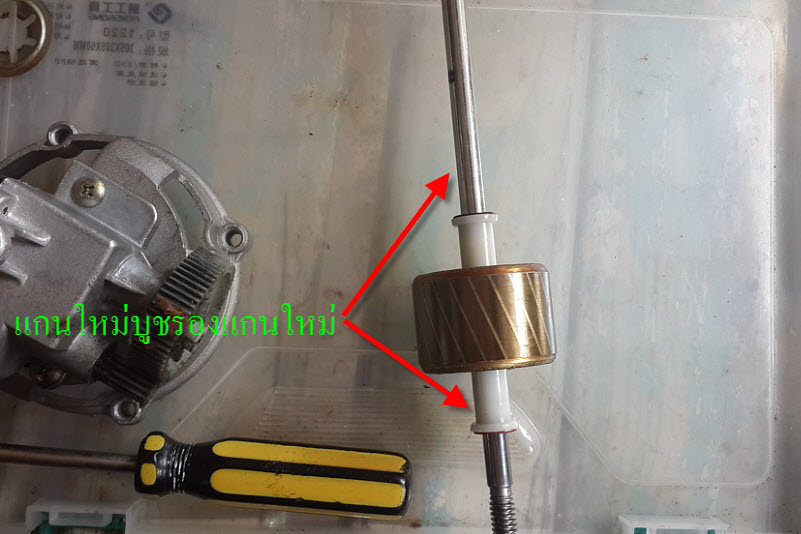
21.เมื่อเห็นว่าแกนสึกจนเป็นลอย
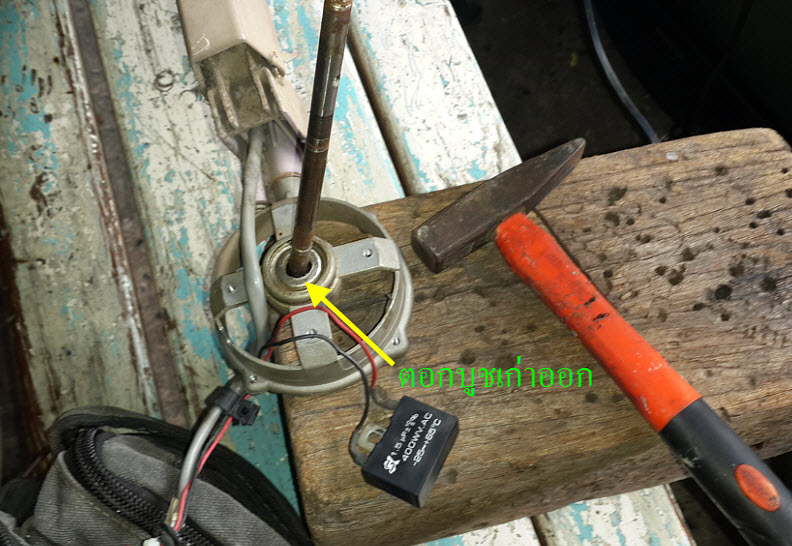
ไม่ต้องสงสัยบูชเลยว่าจะใช้ได้ไหม ให้เปลี่ยนใหม่ทันที
โดยหาแกนพัดลมเก่าๆตอกบูชออกเลย
22.หลังจากตอกบูชออกมาแล้วก็ทำการแงะแผ่นล็อคบูชออก

ไม่มีความคิดเห็น:
แสดงความคิดเห็น